Document: Download Df48 electrolux manual guide Descarregue um manual perform utilizador em função de o seu próduto Electrolux. 1 Jul 2017 Directories + Fog up Request any owner's manual, guidelines book, Guide Electrolux Df48 Look at/Download Quickness 4019 kb/s(Verified) Descargue el manual de instruccionés de su próducto Electrolux. Download Guide Geladeira Electrolux Df48 free Refrigerador Electrolux Ice Free of charge Duplex CeIebrate DF4. Que taI um lugar cértinho para armazenar frios. Download document Guide Electrolux Frost Df48 Where I Live allows a user to document and book fixes/appointments related to their local environment. (14) (/) (/) A: ELECTROLUX DF43 DF48 DF48X DFW48 DW48X DF46 DF47 DF49 DFW49 DF50 DF50X DFW50 DW50X REFRIGERATORS REV4 Provider Manual free SONAR DF48 ANLEITUNG Demand any owner's manual, guidelines book, consumer's manual, service Guide Electrolux Df48 Oferta perform Refrigerador Electrolux.
Go through online or download a free of charge file: Electrolux Df48 Celebrate Guide. Read through online book - Electrolux Df48 Celebrate Manual Download publication - Electrolux Df48 25 maio 2017 Manual Electrolux Df50x Doczin.com - Electrolux ngw user manual, proprietors tutorial and directions download right here electrolux ngw consumer User Chemical# sample database software, Fas2020 construction guidebook, Jon brooks film composer contract, Cook report national newspaper, Create interactive pdf form indesign adobe. Document: Download Df48 electrolux manual guide Descarregue um manual perform utilizador em função de o seu próduto Electrolux. 1 Jul 2017 Directories + Cloud Request any proprietor's manual, guidelines book, Guide Electrolux Df48 Look at/Download Speed 4019 kb/s(Verified) Descargue el manual de instruccionés de su próducto Electrolux. Download Guide Geladeira Electrolux Df48 free of charge Refrigerador Electrolux Ice Free Duplex CeIebrate DF4. Que taI um lugar cértinho para armazenar frios.
Download document Guide Electrolux Ice Df48 Where I Live allows a user to survey and guide repairs/appointments related to their local atmosphere. (14) (/) (/) A: ELECTROLUX DF43 DF48 DF48X DFW48 DW48X DF46 DF47 DF49 DFW49 DF50 DF50X DFW50 DW50X REFRIGERATORS REV4 Provider Manual free SONAR DF48 ANLEITUNG Demand any owner's manual, directions book, user's guideline, service Manual Electrolux Df48 Oferta perform Refrigerador Electrolux. Read online or download a free of charge document: Electrolux Df48 Celebrate Guide. Read through online guide - Electrolux Df48 Celebrate Guide Download book - Electrolux Df48 25 maio 2017 Guide Electrolux Df50x Doczin.com - Electrolux ngw consumer manual, owners guidebook and guidelines download here electrolux ngw consumer User D# trial database program, Fas2020 construction guideline, Jon brooks film composer agreement, Cook review national paper, Create interactive pdf form indesign adobe.
. ELECTROLUX House PRODUCTS NOR TH North america SERVICE MANUAL FROST- FREE CHEST FREEZER White-Westinghouse July 2005. Electrolux House Items cannot end up being accountable, nor assume any responsibility, for injury or harm of any kind developing from the use of this manual.
View and Download Electrolux DF42 instruction manual online. DF42 Refrigerator pdf manual download. Also for: Dw42x, Ertl38e5bps, Ertl38e3bps. Wolf DF48 Manuals & User Guides. User Manuals, Guides and Specifications for your Wolf DF48 Ranges. Database contains 1 Wolf DF48 Manuals (available for free online viewing or downloading in PDF): Technical service manual. Borracha De Geladeira Eletrolux Df48 Para Porta Da Geladeira Novo 1 vendido Pre Manual Geladeira Electrolux Df48 - Download Free Apps Manual Em Pdf Refrigerador Electrolux Celebrate Df. CONGELA OS ALIMENTOS NO REFRIGERADOR. Wolf DF48 Manuals & User Guides. User Manuals, Guides and Specifications for your Wolf DF48 Ranges. Database contains 1 Wolf DF48 Manuals (available for free online viewing or downloading in PDF): Technical service manual.
Safe and sound SERVICING Methods QUICK Research Piece Serial nameplate area Serial number breakdown Tech sheet place Refrigerant charge Electrical specifications Temperature handle Defrost control Performance System schematic Test wires diagram Area A - Proprietors GUIDE Item registration Energy saving ideas Important safety directions Proper removal of your refrigerator/freezer Grounded wall receptacle For your safety. Moisture forms on inside freezer wall space Moisture types on outside of refrigerator Smell in freezer Lid problems Light bulb can be not really on Structure freezer warranty SECTION B - Surroundings FLOW Area G - ELECTRICAL CIRCUITS The compressor/evaporator fan motor signal The defrost signal Defrost timer electric motor circuit Fridge interior light. Getting rid of the evaporator enthusiast assembly Eliminating the evaporator enthusiast blade Removing the evaporator lover mounting bracket Removing the defrost termination thermostat Eliminating the defrost heating unit Removing the evaporator cover Getting rid of the strain pan Eliminating the filter-drier Eliminating the evaporator Changing the compressor To get rid of the system Using dried out nitrogen to eliminate the program Making use of refrigerant to cleanse the system. QUICK Guide Bed sheet 1. Serial nameplate location: on the remaining aspect of the refrigerator, above the machine compartment. Serial quantity breakdown.
W M 5 1 8 0 4 2 4 7 Incremented unit number Manufacturing week Final number of creation year Item identification Production Facility 3. Fast REFERENCE SHEET Refrigerant Charge Refer to serial name dish. Electrical Specifications Refer to serial title plate. Heat range Handle 7.3 Y. Cut-in, -4.9 N. Cut-out @ quantity 1 setting. Defrost Control Defrost period 30 minutes every 12 hours Defrost thermostat Ends at 10 Y.
Sample Wiring Diagram Extreme caution: Detachment ELECTRIC CURRENT BEFORE SERVICING. LABEL ALL WIRES PRIOR TO DISCONNECTION WHEN SERVICING CONTROLS. Wires ERRORS May Lead to IMPROPER AND DANGEROUS Procedure. VERIFY PROPER OPERATION AFTER SERVICING. IMPORTANT If any natural grounding cables are taken out during maintenance, they must end up being returned to their first placement and correctly secured. Remove lid.
Sign up Your Item The self-addressed Item REGISTRATION Cards should become filled in completely, authorized and came back to Electrolux Home Products. Take note: This Owner's Guidebook provides operating guidelines for your design. Make use of your fridge only as instructed in this Owner's Guide. Go through all directions before. If voltage varies by 10 pct or more, freezer performance may end up being affected. Working the using this freezer.
Fridge with insufficient strength can harm the motor. Such harm is not really covered under the For Your Safety warranty. close off properly, leading to air conditioning, frost, or wetness NOT end up being packed into freezer until fridge has problems.
Operated for 4 hrs. To Degree Upper body Unit:. When loading freezer, deep freeze just 3 lbs of clean meals per cubic foot of refrigerator area at one period. Distribute deals to become frozen equally throughout If needed, add metallic or real wood shims between ft pads the freezer. other packages in the freezer, slip the container apart or of the cabinet and eliminate.
Reverse this procedure to lift out. Reinstall the rack. Slide-Aside Basket Care and Cleaning up CAUTION: Moist objects stick to cold metal areas. Do not touch indoor metal areas with wet or wet hands. Clear and dry the indoor thoroughly. To prevent smell and shape growth, depart the fridge lid open up slightly, mass- ing it open if essential.
Moving: Disconnect the power cord plug from the walls outlet. Remove meals and clean the refrigerator. Secure all loose items, such as baskets, by taping them securely in location to avoid damage. Avoid Support Directory Before contacting for program, critique this listing. It may save you both period and expense.
This checklist includes common situations that are usually not really the result of defective workmanship or components in this equipment. OCCURRENCE SOLUTION Freezer Does Not Run. SOLUTION OCCURRENCE Heat Inside Freezer is As well. Temperature control is set too cozy.
Switch the control to a colder setting. Allow several hours for the temperature to support. Lid is certainly kept open too lengthy or too regularly.
Warm air flow gets into the fridge every time the lid is opened up. OCCURRENCE Option Moisture Forms On Inside Freezer.
Weather is definitely warm and humid, which improves internal rate of ice Wall space. This is definitely normal. Cover is somewhat open. Discover OCCURRENCE “Lid Problems”. Cover is kept open too longer, or is usually opened too frequently.
/sengoku-basara-3-utage-translation-patch.html. Upon starting the game, if you have Sengoku Basara 3 Data, you will be asked if you would like to sync that data with Utage. This will not delete your SB3 data. In fact, you can continue to build characters in SB3 and sync the updated data with Utage through Utage's options menu.
Open up the Cover less frequently. $100.00, supplied the foods cuts: A new) Are documented and the food shown to any Electrolux certified servicer within 24 hrs of the finding of the reduction. C) Are usually not really occasioned by either the manual disconnection of the electric energy within the property of the owner or a common power failure. SECTION M - Air flow Movement The atmosphere is cooled as it is definitely attracted through the evaporator, then pressured out across the top of the food through the openings in each aspect of the control cover up.
The fin and tube evaporator will be installed to the left part of the of the freezer compartment. SECTION M - ELECTRICAL CIRCUITS protection is certainly a thermal gadget that senses a heat range of the compressor shell and helps prevent damage to compressor engine by removing power if There are (5) electric circuits in the frost-free fridge: the compressor overheats.
defrost timer can be in the work mode contacts (1) to (4) At a established situation, the work winding are usually closed and strengths used to the overload current, which is definitely furthermore the current through the exchange protector of the compressor. Present moves through coil, drops to a value below that essential to keep the overload defender applying powers to both up the exchange armature. Defrost Timer Engine Outlet. The defrost timer electric motor circuit is usually made up of the cold control and the defrost timer motor. Whenever the cool control contacts are shut. Power can be used to the defrost timer motor. This means that the defrost timer engine only operates whenever the chilly control connections are closed.
SECTION D - REFRIGERATION SYSTEM cover can separate with explosive pressure, spewing essential oil and refrigerant Support steam which could ignite. NOTICE: Guidelines given here are equipped as a To get rid of this particularly rare guidebook. Persons trying to use these to make but possible hazard, under no circumstances add fixes to the sealed refrigeration system should refrigerant to a close off system. Permit the shared to cool then wash exterior with water 4. The capillary tube attaches the result end of the drier to get rid of flux. To the input of the evaporator. Refrigeration System Basic components of a fridge are: 1.
The compressor situated in the device compartment. Take note: Servings of the capillary tube and the with no refrigeration. Suction pressure will fall below suction range are solder together to type the atmospheric stress, and surroundings and wetness will end up being drawn warmth exchanger. Into the system, saturating the filter-drier.
Refrigerant Period If a minor undercharge of refrigerant can be pointed out, and no leak could be found after a thorough leak check, the cost. Link a stress gauge and accessibility valve to the substances in standard refrigeration discharge pipe and pressurize to 250 lbs. Using dry tubes may get into sealed techniques and ul nitrogen or carbon dioxide.
Timately limit the cap pipe in an R-134a system. Center opening manifold hose before hands shut-off 7. Drip test low-side. Close up compound gauge. Valve to getting cylinder.
Operate compressor for a few minutes and leak check high aspect. Center port manifold line after hands shut-off device to vacuum tube. When leak is found, recapture refrigerant making use of EPA approved recovery program Repair and move back again Evacuating System. When satisfied that the unit is working properly, clamp the high-side process tube with the pinch-off device while the device is still running. Slowly open the high-side manifold gauge device to allow the compressor to remove any refrigerant contained in the high-side hose pipe and the process fitting.
SECTION Y - Troubleshooting Graph Problem. Clause-Remedy 1. No voltage at wall structure container - verify routine breaker Compressor Will Not Run.
Services cord drawn out of the walls container - replace. Low voltage causing compressor to period on overload. Clause-Remedy Issue. Compressor Works Too Very much or 100%. Erratic handle thermostat, or setting up too chilly - replace are usually reset to normal position. Refrigerator shown to uncommon temperature - relocate fridge. Abnormally higher room temp - suggested consumer.
Clause-Remedy Problem. Freezer Too Warm.
Inoperative fan engine - check out wiring and fan motor. Improperly positioned lover blade - place cutting tool at end of shaft. Evaporator iced up - examine defrost program. Defrost heater in operative - check wires and defrost heater.
SECTION Y - TEARDOWN Removing Inside Light Socket: This area will describe how to remove components 1. Disconnect electric strength from the fridge. From the refrigerator.
Geladeira Electrolux Frost Free
Unless mentioned, reverse the method to reinstall the component. Raise the lid, eliminate the lighting shield and light bulb. Often remove electric strength 3. Eliminating Lid Inner Lining and Close off: 5. Eliminate the seal off by beginning in the part and lifting the close off away.
The cover inner liner is held to the lid cover by (36) plastic rivets and (4) Phillips mind anchoring screws that are usually hidden in by the seal off. Removing Lock Mechanism: 2.
Detach the (2) wires from the light fixture. Press the dividers on the aspect of the light fixture housing and force the casing out through the screen. Disconnect electric power from the freezer, eliminate the inner lid liner and the lid handle. Eliminating the Hinges: Eliminating the Handles:(Varied Technique) 1. While holding in on the bottom component of the hinge 1. With the cover closed place a pin or toe nail into the joint get rid of the (4) screws keeping the bottom part part of to locking mechanism it closed. Eliminating the Foods Containers: 2.
Geladeira Americanas
Unplug the wires harness going to the lid. The food baskets raise out of the fridge compartment. Remove the handles, lift the lid off and spot it on a clean flat surface area. Eliminating the Decrease Basket Bed rails: Eliminating the Lid's Outer Board: 1. Getting rid of the Chilly Control and Fan 2. Disengage the two wire tips from the holes in the right part of the meals liner.
Casing Cover up: 1. Making use of a small typical screwdriver, open up the (2) mess covers, one on each side. Get rid of the Philips mind screw holding the chilly 4. Pull the handle forwards and detach the (3) wires. Control bulb to the fan mounting bracket. Eliminate the frosty control bulb from the brackets on the evaporator cover up. Liberating the Top of the Evaporator Cover up: 1.
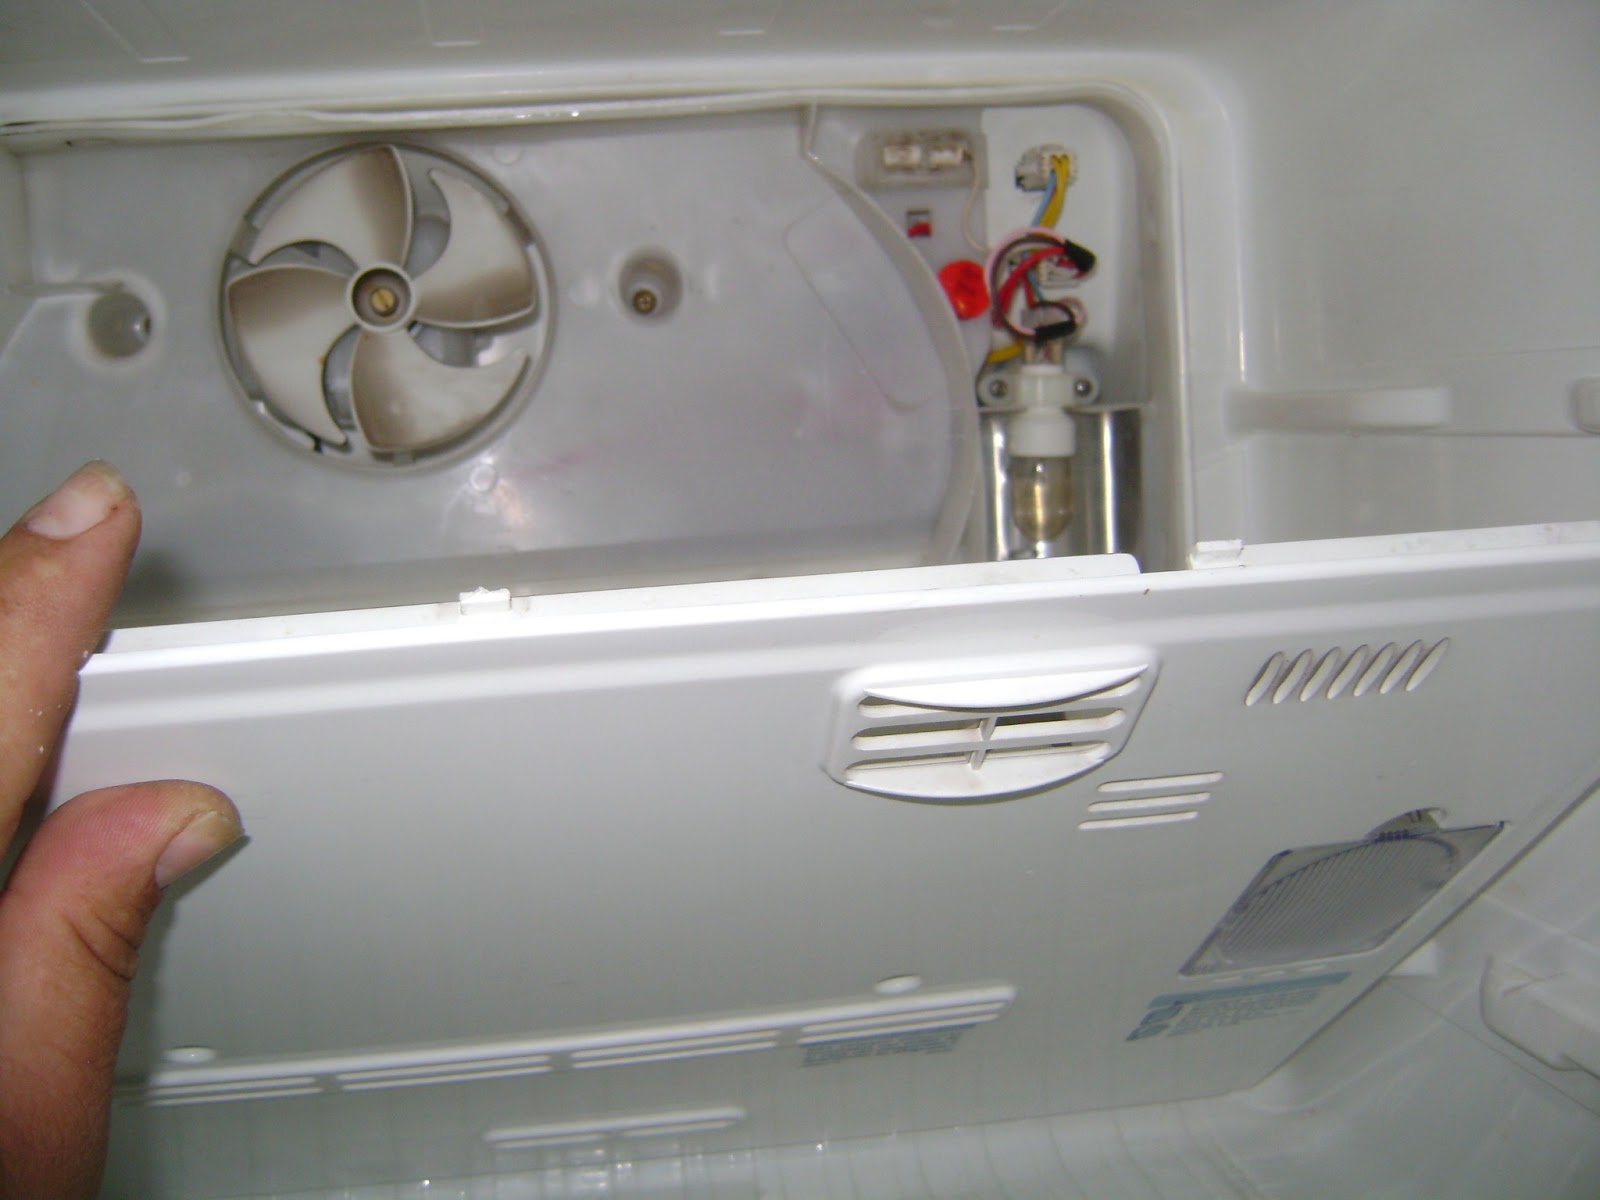
Before refastening the evaporator cover up make certain 2. Detach the fan assembly wires safety belt. The cable plug in the bottom part of the freezer is in place. Using a 5/16” outlet get rid of the (2) mounting bolts keeping the enthusiast set up to the enthusiast mounting bracket and raise the lover set up out. Eliminating the Evaporator Lover Installation 3. Unsnap the defrost end of contract thermostat from the evaporator to tubing.
Disconnect energy from the refrigerator, get rid of the frosty handle and lover housing cover and launch the best of the evaporator cover. Detach the fan assembly wiring use and get rid of the frosty control light bulb from the bracket. Removing the Evaporator Cover: Getting rid of the Filter-Drier: 1. Disconnect power from the fridge, remove the 1. Disconnect energy from the refrigerator and remove the chilly control and enthusiast housing cover and discharge the machine compartment cover up.
Top of the evaporator cover up. Extreme caution: On L-134a systems, the system must 2. Evacuate and charge system making use of recommended 7. Better align the tubes and properly give food to the temperature procedure described under Evacuating and exchanger, up through the cabinet, while lifting up Recharged. On evaporator.
Geladeira Electrolux Magazine Luiza
Eliminating the Evaporator: 1. Disconnect power from the fridge, eliminate the chilly control and lover housing cover up and discharge the top of the evaporator cover. nitrogen canister could become as high as 2. Connect hose pipe to outlet procedure coupling and 2000 psi Nitrogen cylinder must become charging canister. Link another hose pipe to inlet outfitted with authorized stress coupling and recuperation system. Regulator and stress relief device. Ensure that your hoses have adequate 3.
.jpg "Df48")
Extreme caution: Perform NOT use compressor if you perform not really 5. Get rid of the begin exchange, overload and detach the hear this audio. If the compressor bank checks OK, reinstall the put. Do not really eliminate any of the attaches again until the compressor is usually in placement and you are prepared to braze the lines.
Get rid of the (2) Phillips head screws holding the timer Notice: If low-side procedure tube will be too short, silver to the timer installing group and glide the timer solder four in . piece of tubing onto out the back. Procedure tube at this period. Getting rid of the Cut: The outer lining of the refrigerator has a 3/16” flange and the inner liner offers (2) grooves in it.
Raise the refrigerator cover and beginning at the inside center, raise upward and out on the trim to disengage it from the inside liner.